View Ticket Details
In this section, you'll learn to:
- Use the List widget to display tickets.
- Filter tickets in the List.
- Write JavaScript code using JS Objects.
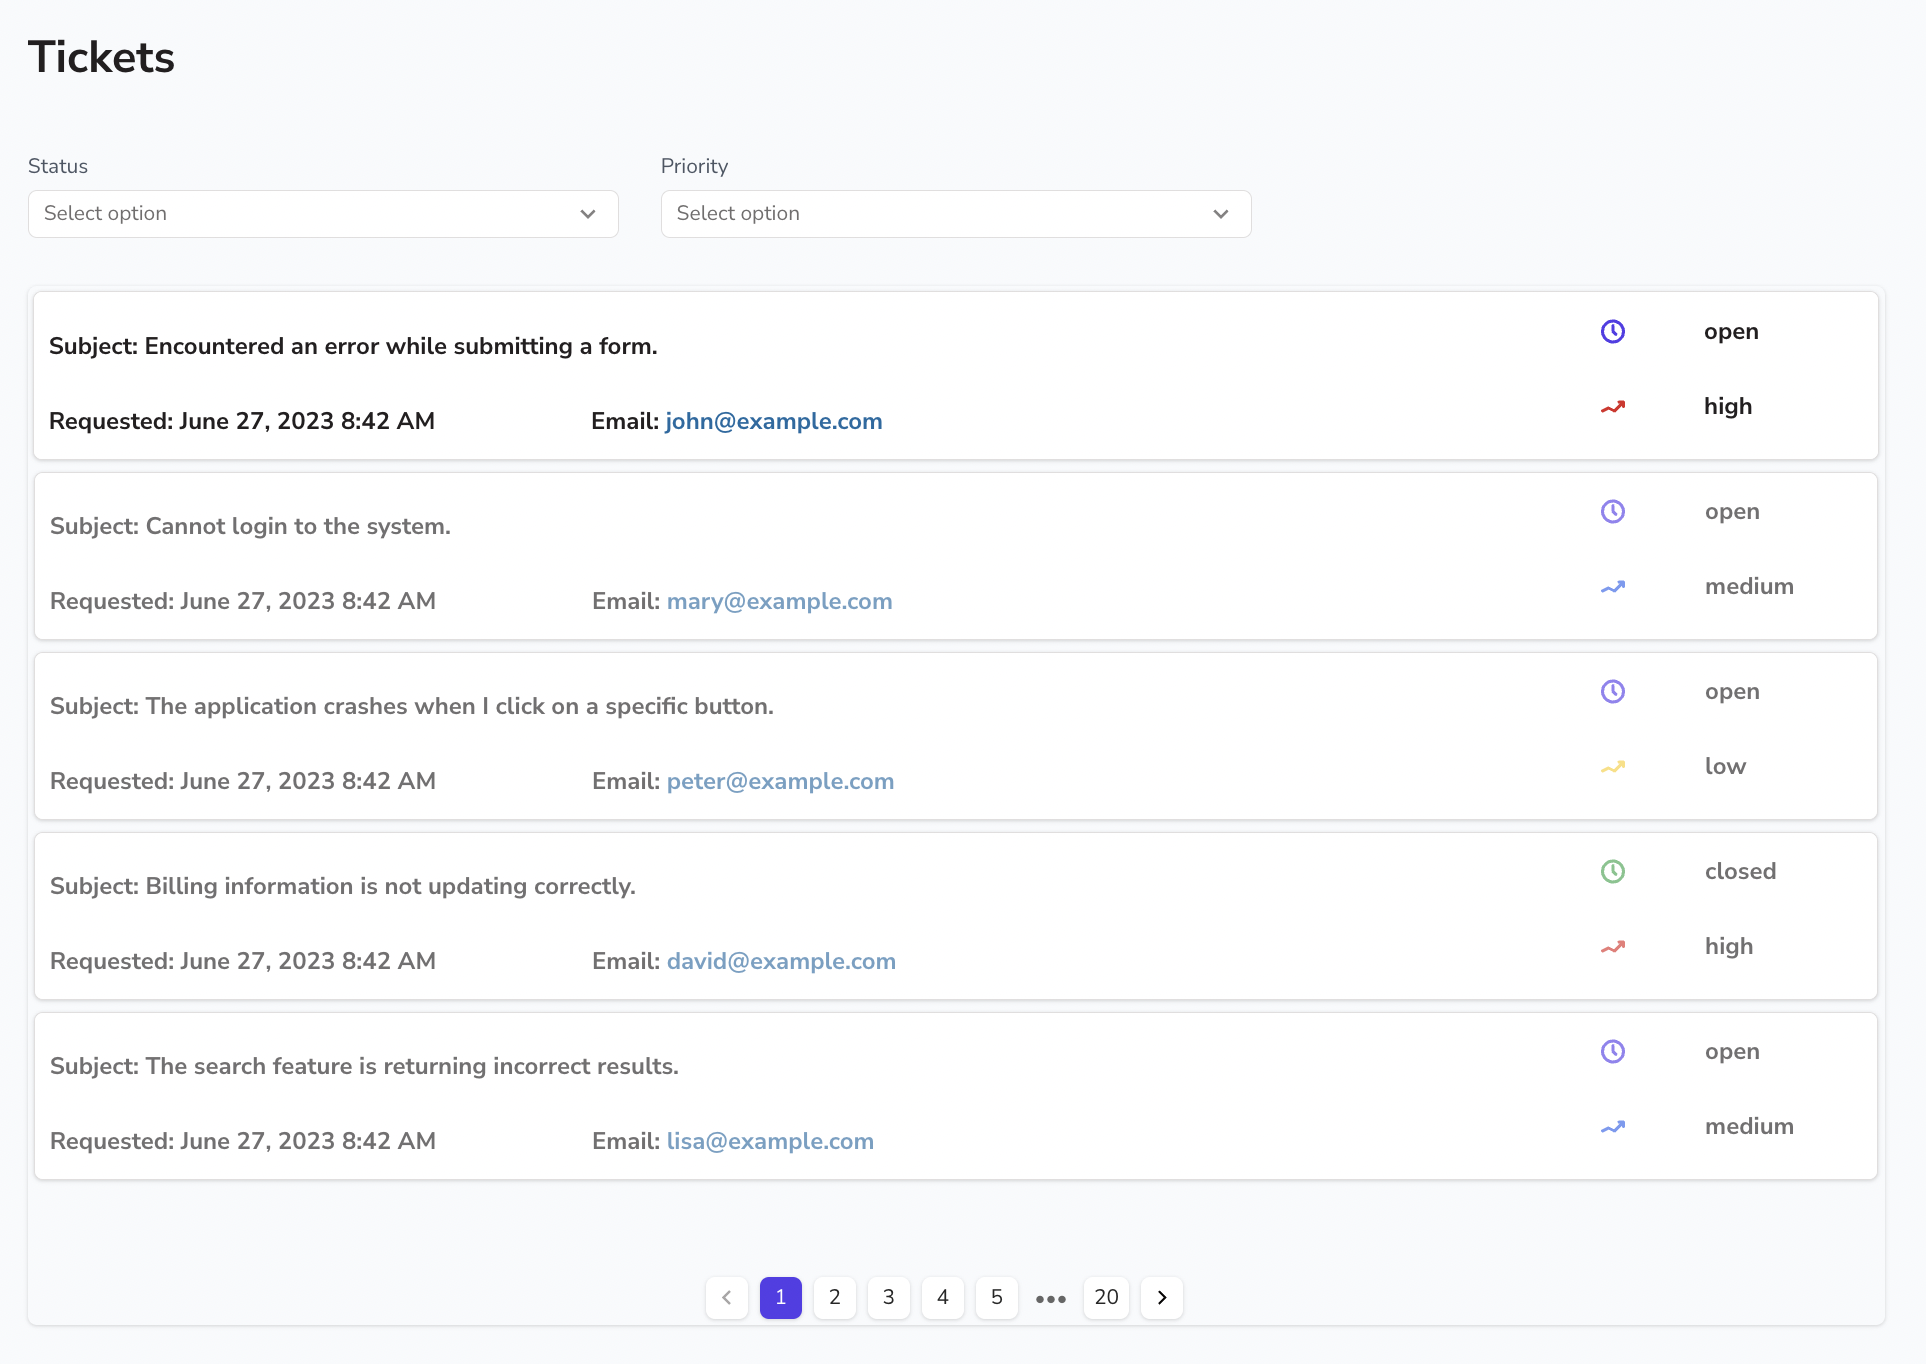
Here's a screenshot of the final result:

Fetch tickets data
On the Entity Explorer to the left of the screen, click on the Tickets page you created in the Setting up the application section.
On the Explorer tab, click the + icon next to Queries/JS.
Select the supportTickets query from the list of options.
Rename the query to
getTickets. Click the white space near the query templates.Write the following SQL query.
SELECT * FROM support_ticket;Click the Run button on the top right of the screen to execute the query and confirm that it returns data.
Click the Settings tab. Switch on the Run query on page load option.
Build UI
Go back to the canvas by clicking on the Tickets page on the Entity Explorer.
Drop a Text widget and two Select widgets on the canvas.
To set the title using the Text widget:
- Change the default value on the Text property from Label to
Tickets. - Click the Style tab on the Property Pane. Select XL in the Font size property list.
- Change the default value on the Text property from Label to
Select the first Select widget, set the properties as shown below:
- On the top of the property pane, change the name of the widget from Select1 to
selStatus. - In the Options property, add the below JSON array object to populate the status options.
[
  {
    "label": "Open",
    "value": "open"
  },
  {
    "label": "In Progress",
    "value": "in progress"
  },
  {
    "label": "Closed",
    "value": "closed"
  }
]- In the Text property, enter
Status.
- On the top of the property pane, change the name of the widget from Select1 to
Similarly, for the second Select widget, set the properties as shown below:
On the top of the property pane, change the name of the widget from Select2 to
selPriority.In the Options property, add the below JSON array object to populate the priority options.
[
  {
    "label": "High",
    "value": "high"
  },
  {
    "label": "Medium",
    "value": "medium"
  },
  {
    "label": "Low",
    "value": "low"
  }
]
In the Text property, enter
Priority.
The output should look something like this:

Display ticket details
Drop a List widget on the canvas below the Select widgets.
On the top of the property pane, change the name from List1 to
lstTicketDetails.Delete the default Text and Image widgets in the first list item.
In the Items property, enter
{{getTickets.data}}to connect the results of the query to the List widget.Now customize the List widget as follows:
- Drop five Text widgets for displaying the ticket subject, requested date, customer email, ticket status and priority.
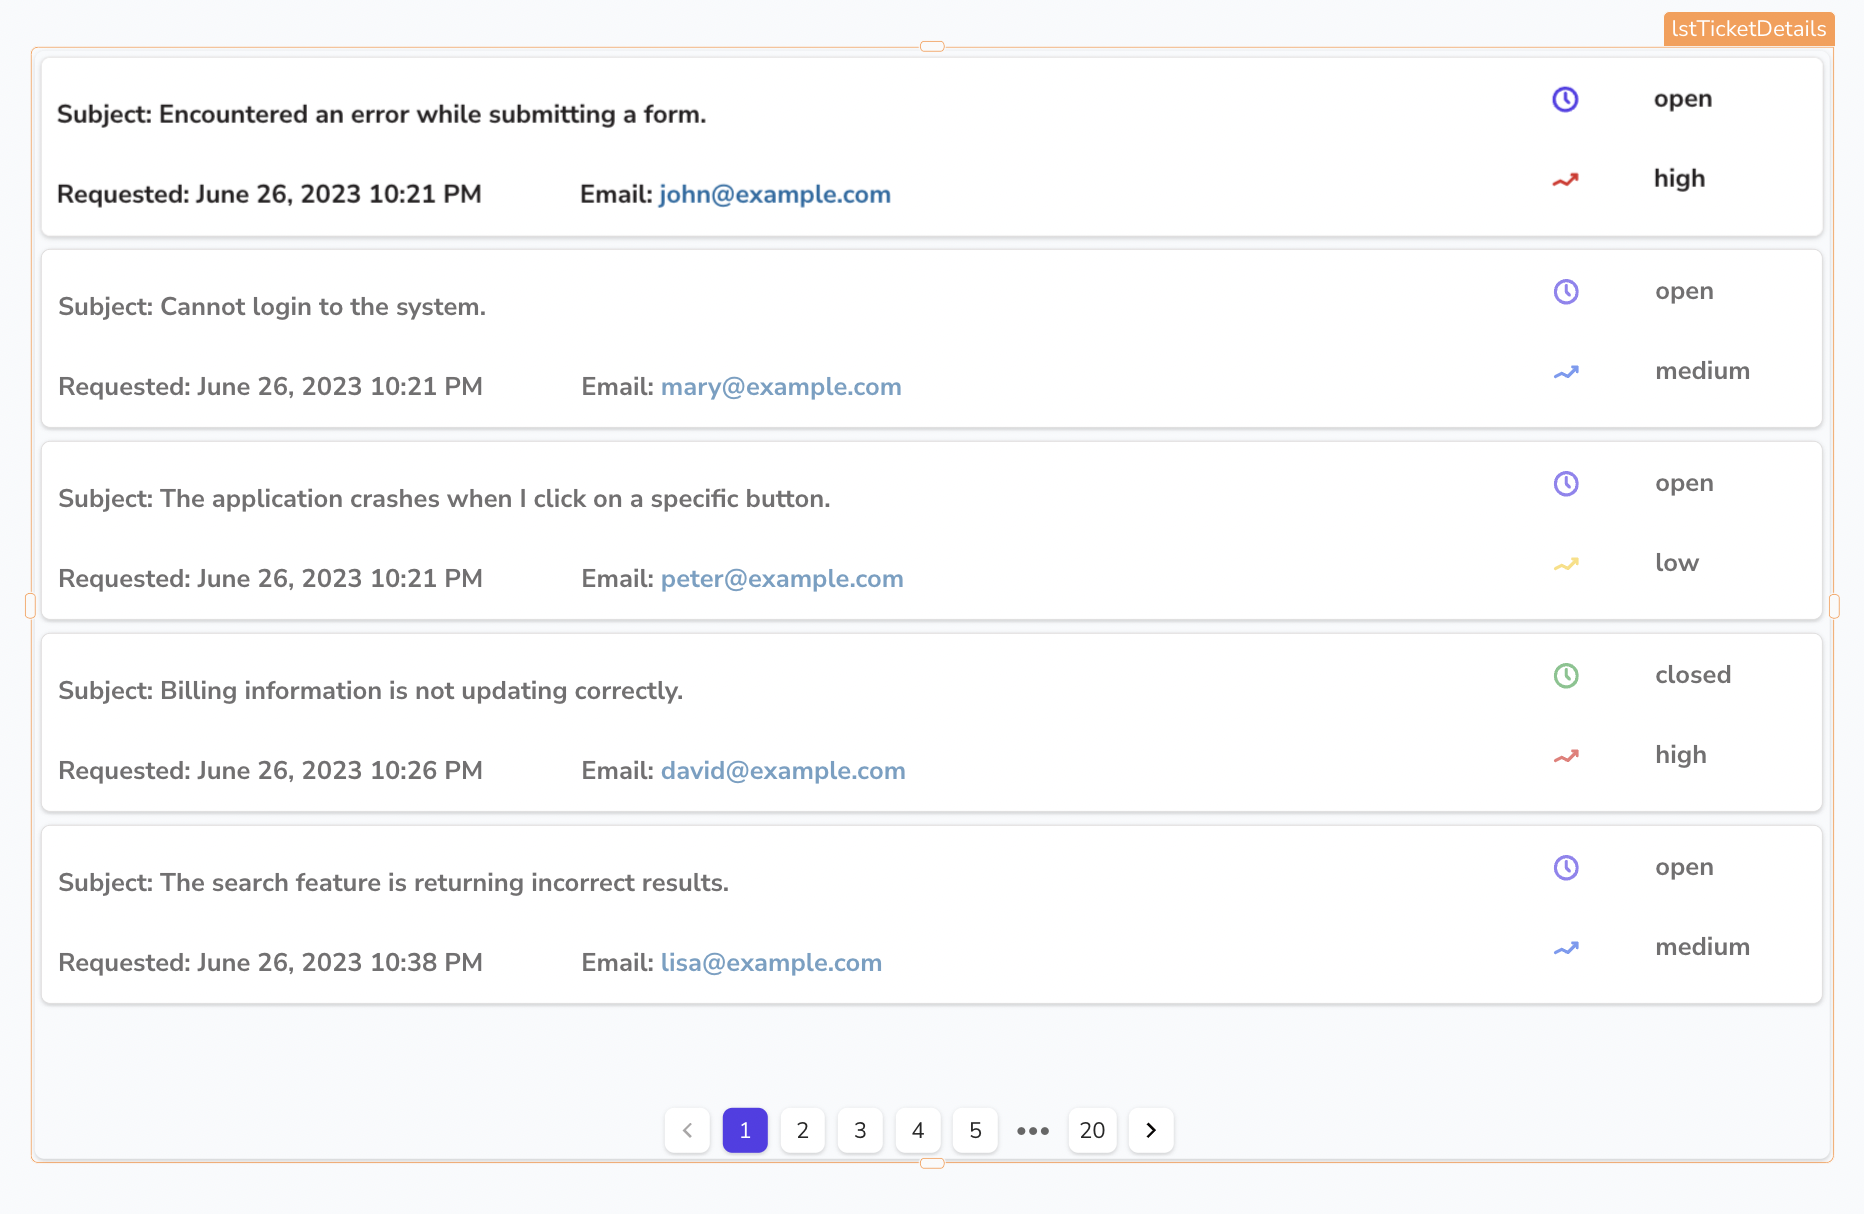
- Notice that all the changes you make in the first list item reflect in the subsequent list items that are greyed out. Refer to Fig 3 for the placement of the widgets in the first list item.
You now need to display the data from the query in these Text widgets. In step 2 above, you already connected the List widget to the getTickets query. Select each Text widget and use the
currentItemreference property to display the data in the list items as shown in the table below:Property Value Text Subject: {{currentItem.description}}Text Requested: {{moment(currentItem.created_at).format("LLL")}}Text Email: {{currentItem.user}}Text {{currentItem.status}}Text {{currentItem.priority}}Note that for the
created_atdatabase column, you are using the built-in library Moment.js to format the date and time. Use the resize handle of the Text widgets to fit the contents.Let's add two Icon widgets next to the status and priority Text widgets and conditionally set the color.
Select the Icon widget for Status.
- In the Icon property, search
timeand select the icon. - Click the Style tab.
- In the Button variant, select the Tertiary option.
- In the Button Color property, click the JS button and write code to show different colors for open and closed tickets as shown below:
- In the Icon property, search
{{currentItem.status == 'open' ? appsmith.theme.colors.primaryColor : currentItem.status == 'closed'? '#16a34a': currentItem.status == 'in progress' ? '#eab308': undefined}}
Select the Icon widget for Priority.
- In the Icon property, search
trending-upicon and select the icon. - Click the Style tab.
- In the Button variant, select the Tertiary option.
- In the Button Color property, click the JS button and write code to show different icon colors for tickets based on priority as shown below:
- In the Icon property, search
{{currentItem.priority=='high' ? '#dc2626' : currentItem.priority=='medium' ? '#2563eb': currentItem.priority=='low' ? '#facc15' : undefined}}
Refer to Fig 3 for the output and placement of the widgets in the List.

Filter tickets
Now, you have to program the Select widgets created in the Build UI section to filter the data in the List.
In the Explorer tab, click the + icon next to Queries/JS.
Select New JS Object from the Create new list.
Click the pencil icon next to the default name JSObject1 and rename it to
utils.You have to write JS code to filter the tickets based on the values selected in the Select widgets. Delete the default code in the JS editor and paste the code snippet below:
export default {
  getFilteredTickets: async () => {
  const tickets = await getTickets.run();
  const status = selStatus.selectedOptionValue;
  const priority = selPriority.selectedOptionValue;

  let filteredTickets = tickets;

  if (status) {
    filteredTickets = tickets.filter(a => a.status === status);
  }

  if (priority) {
    filteredTickets = tickets.filter(a => a.priority === priority);
  }

  if (status && priority) {
    filteredTickets = tickets.filter(a => {
    return a.status === status && a.priority === priority;
    });
  }

  return filteredTickets;
  },
}
Click the Run button on the top right of the screen to ensure that the function executes successfully.
Go back to the canvas by clicking on the ← Back button above the JS editor.
To filter the list based on the value selected in the Status filter, you need to run the JS function every time the filter is changed. Click the Status Select widget. Set the properties as follows:
- Scroll down to the Events section.
- Click the + icon next to the onOptionChange event.
- In the Select an action list, select Execute a JS function > utils > getFilteredTickets.
Repeat step 7 for the Priority filter.
Select the List widget. You need to update the Items property to display the data returned by the utils function now instead of the results directly from the getTickets query. Replace
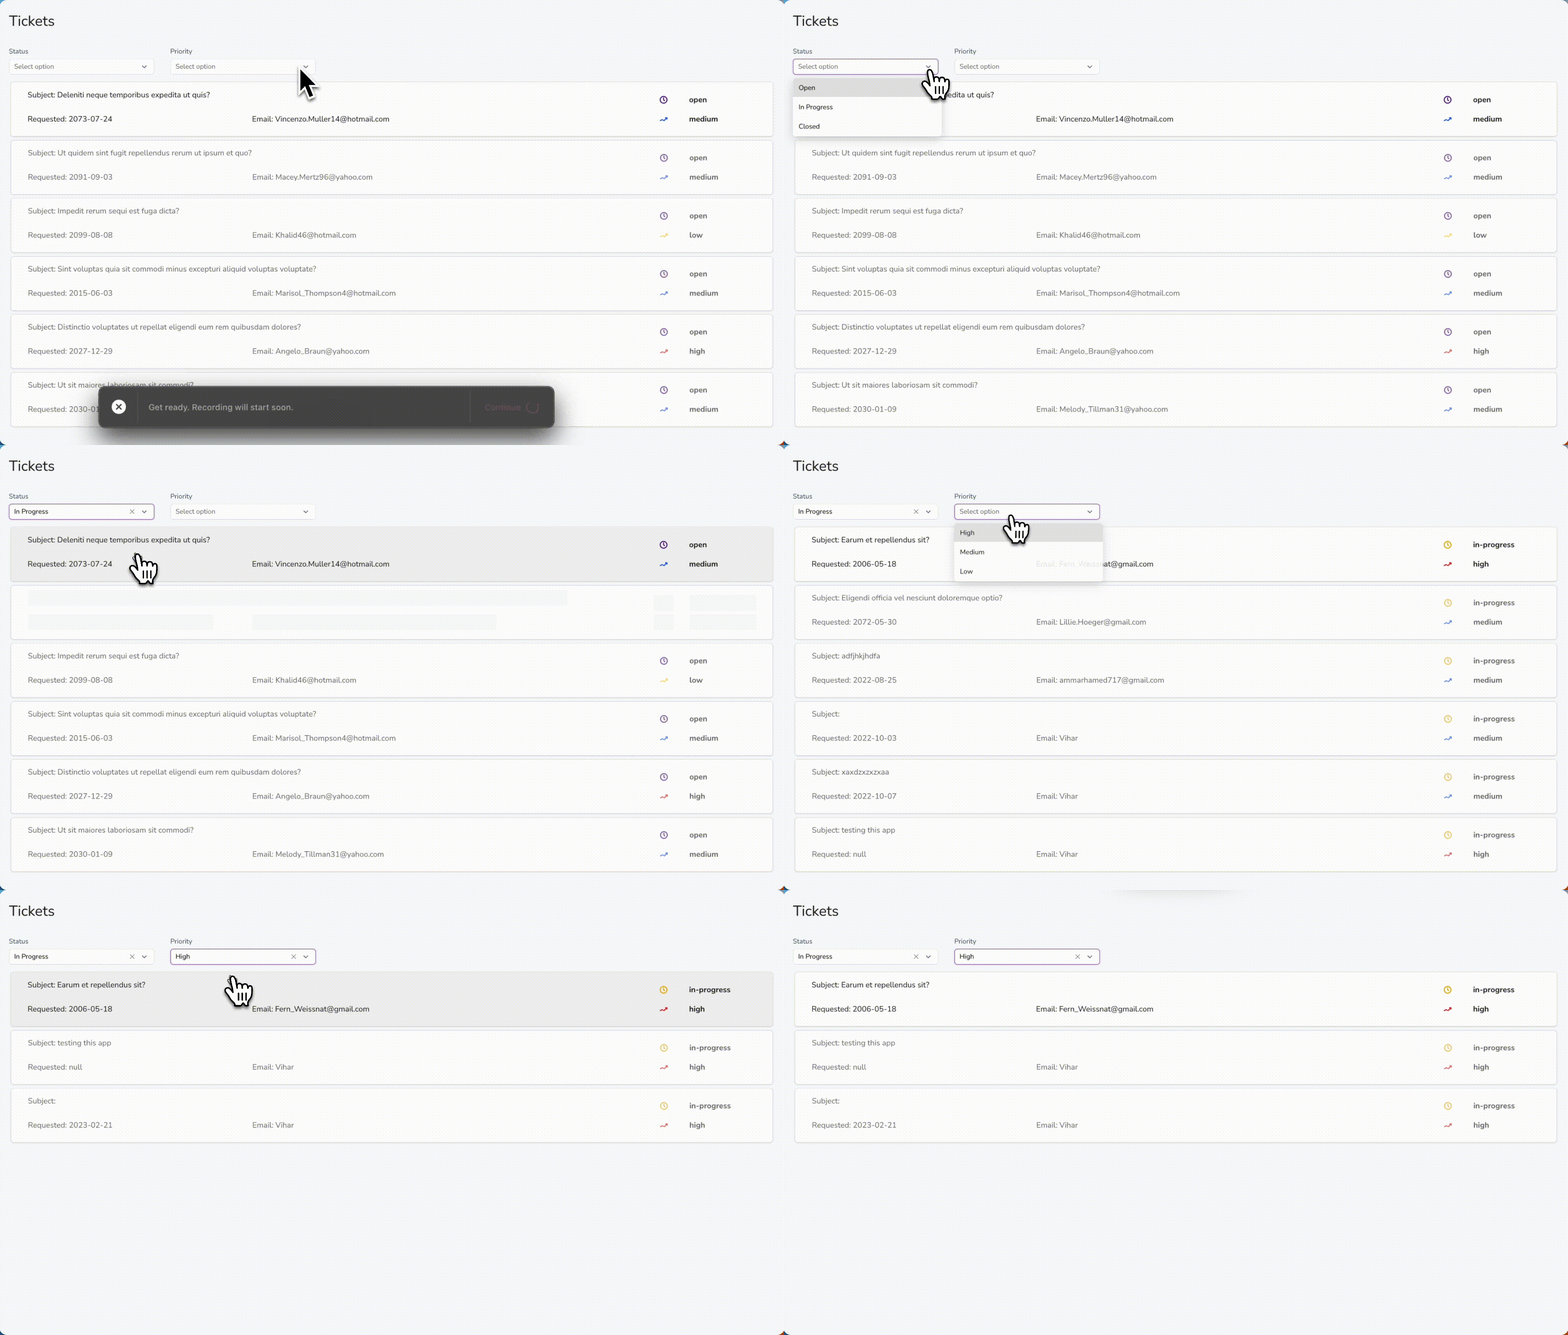
getTickets.datawith the code below to fetch the filtered data from the function:{{utils.getFilteredTickets.data}}Test the Status and Priority filters to see how the data in the List updates when options are changed.

