Edit Ticket Details
In this section, you'll learn to:
- Use a JSON Form to edit the ticket details
- Update and save ticket details.
Build UI
When you click a list item, you need to open a modal to edit the ticket details in a form.
- On the Tickets page, drop a Modal widget on the canvas.
- On the top of the property pane, change the name from Modal1 to
mdlEditTicket. - Select the Modal Title Text widget. Change the title in the Text property to
Ticket Details. - Delete the default Close and Confirm buttons.
- Increase the width of the Modal using the resize handle.
- On the top of the property pane, change the name from Modal1 to
If you accidentally close the Modal, you can open it again by selecting the name of the modal mdlEditTicket under the Explorer tab in the Widgets section.
Close the mdlEditTicket Modal.
Select the lstTicketDetails List.
- Click the + icon next to the onItemClick event.
- In the Select an action list, select Show modal > mdlEditTicket to open the Modal on list item click.
Drop a Tabs widget inside the Modal.
- In the Tabs property, rename the default tab names from Tab1 and Tab2 to
DetailsandComments. - Increase the width of the Tabs widget using the resize handle.
- In the Tabs property, rename the default tab names from Tab1 and Tab2 to
You need to display the details of the currently selected item in the List. Drop a JSON Form widget inside the Details tab.
In the Source data property enter:
{{lstTicketDetails.triggeredItem}}This code displays all the details of the currently selected item in the List.
Under Field configuration properties:
- You need to prevent user edits in the ID, User and Created At fields.
- Click the gear icon next to Id field. This action opens up the individual properties of the field.
- Scroll down in the property pane. Turn on the Disabled toggle.
- Click the ← icon on the top to return to the widget properties.
- Repeat this step for the User and Created At fields.
- Click the gear icon next to the Status field.
- In the Field Type list, choose Select option.
- In the Options property, enter:
[
  {
    "label": "Open",
    "value": "open"
  },
  {
    "label": "In Progress",
    "value": "in progress"
  },
  {
    "label": "Closed",
    "value": "closed"
  }
]
Click the ← icon on the top to return to the widget properties.
Click the gear icon next to the Priority field.
- In the Field Type list, choose Select option.
- In the Options property, enter:
[
  {
    "label": "High",
    "value": "high"
  },
  {
    "label": "Medium",
    "value": "medium"
  },
  {
    "label": "Low",
    "value": "low"
  }
]
Click the ← icon on the top to return to the widget properties.
Click the gear icon next to the Category field.
- In the Field Type list, choose Select option.
- In the Options property, enter:
[
  {
    "label": "Billing",
    "value": "Billing"
  },
  {
    "label": "Account",
    "value": "Account"
  },
  {
    "label": "Technical",
    "value": "Technical"
  }
]
Click the ← icon on the top to return to the widget properties.
Click the gear icon next to the Due Date field.
- In the Field Type list, choose Datepicker option.
- Click the ← icon on the top to return to the widget properties.
Click the gear icon next to Assigned to field.
- In the Field Type list, choose Select option.
- In the Options property, enter:
[
  {
    "label": "John Doe",
    "value": "John Doe"
     },
  {
    "label": "Karmila Fox",
    "value": "Karmila Fox"
  },
  {
    "label": "Sarah Smith",
    "value": "Sarah Smith"
  }
]- Click the ← icon on the top to return to the widget properties.
- You need to prevent user edits in the ID, User and Created At fields.
Under General properties section:
- Delete the default value
Formfrom the Title property. - Turn off the Show reset toggle.
- Change the value in the Submit button label property to
Save.
- Delete the default value
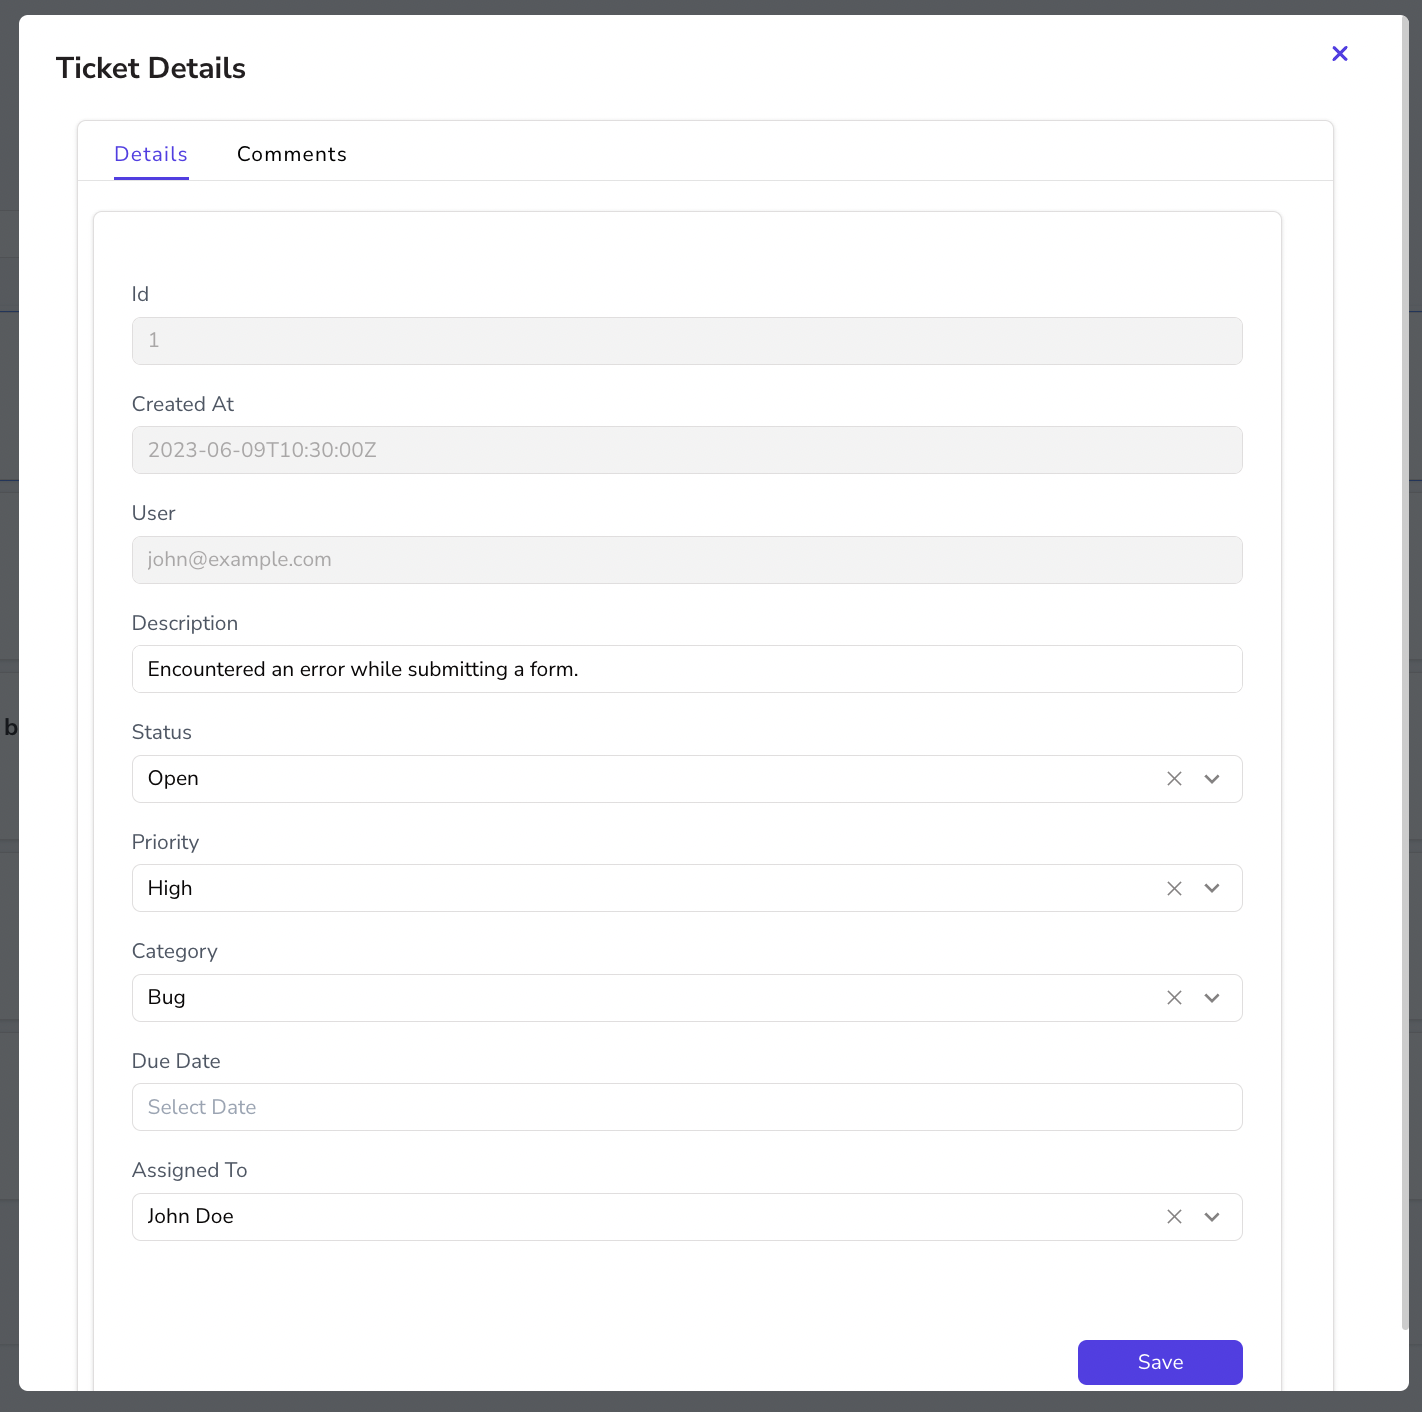
The output should look something like this:

Write update ticket query
You have to create an update query to save the modified ticket details to the database.
Select the Explorer tab on the Entity Explorer to the screen's left.
Click the + icon next to Queries/JS.
Select supportTickets query from the list of options.
Rename the query to
updateTicket. Click the white space near the query templates.Write the following SQL query.
UPDATE support_ticket SET
"description" = '{{JSONForm1.formData.description}}',
"status" = '{{JSONForm1.formData.status}}',
"priority" = '{{JSONForm1.formData.priority}}',
"category" = '{{JSONForm1.formData.category}}',
"assigned_to" = '{{JSONForm1.formData.assigned_to}}',
"due_date"='{{JSONForm1.formData.due_date}}'
WHERE "id" = '{{lstTicketDetails.triggeredItem.id}}';
Return to the canvas by clicking the ← Back button above the query editor.
Save edited tickets
Click the first list item to open the Modal.
Select the JSON Form. Scroll down to the bottom in the Property pane. Click the JS button next to the onSubmit event.
You have to write code to call the update query, refresh the List widget, show a message, and close the Modal. Write the JS code as shown below in the onSubmit event property:
{{
  updateTicket.run().then(() => {
  utils.getFilteredTickets();
  showAlert('Ticket Updated', 'success');
  closeModal('mdlEditTicket');
  });
}}
Modify any field and click the Save button to ensure the ticket details update is visible in the database and the List.
