Upload or Download Files to and from S3
Files can be uploaded to Amazon S3 using the S3 plugin and FilePicker Widget. This document presumes you have successfully connected to your S3 instance
Uploading a File
To upload a file
- Drag a Filepicker widget onto the canvas.
- Create a new S3 query named upload_file to be run onFileSelected.
- Select the Create File Action option for the query.
- The action should be configured with the bucket name and relative path of the location you want to store the file.
ex. images/any intermediate folders not existing are automatically created. - The name of the file should be configured in the file path field. This value can be picked from the Filepicker using JavaScript
images/{{ Filepicker1.files[0].name }} - The content can be configured using the entire file object of the Filepicker.
{{Filepicker1.files[0]}} - Select a file from the file picker and hit upload.
-151eecdaecfea4af98a5699139ef221a.png)
Downloading Files
To download a file
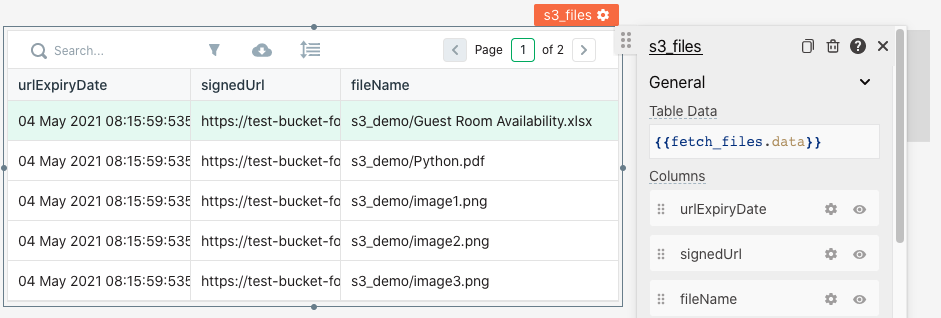
Drag a Table onto the canvas and name it s3_files.
Create a new S3 query named
fetch\_filesto fetch all the files in your bucket.Configure it with the List Files action.
Set the bucket name from where to fetch the files and run the query
Bind the response of the query to the Table using JavaScript in the Table Data Property
{{fetch_files.data}}.Now your table should list all the files present in your S3 bucket.

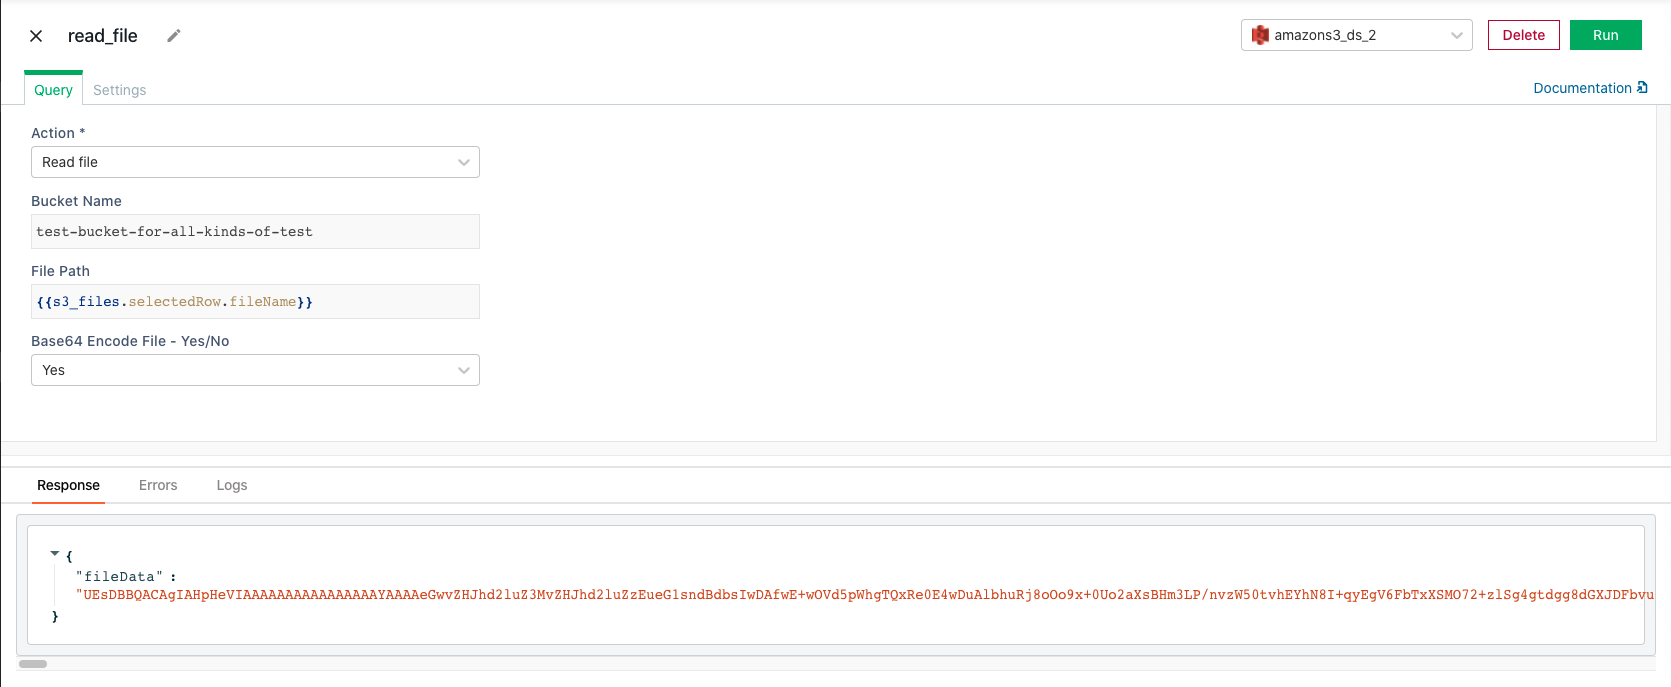
- Create a new S3 query named read_file to read file data from S3 bucket.
- Configure it with the Read File action.
- Set the bucket name from where to fetch the file
- Set
pathto the file path selected in the table using the JS expression{{s3_files.selectedRow.fileName}}

To download the file selected in the table
Click the
JSbutton next toonRowSelectedAction and write thefollowing JavaScript query:
{{read_file.run(
()=>{download(atob(read_file.data.fileData),s3_files.selectedRow.fileName.split("/").pop())})}}- Click any row in table
s3_filesto download the corresponding file from your S3 bucket.
